

Overview
Webhooks are the push half of Async Inference. Instead of pollingGET /v1/async/.../{job_id} until a job reaches a terminal state, register an endpoint and name it on submit, and Bifrost delivers a signed HTTP POST the moment that job completes or fails.
Every delivery is signed in the Standard Webhooks format so your receiver can verify it came from your Bifrost instance and was not altered in transit.
Webhooks fire only for async inference jobs. Like Async Inference, this is a gateway-only feature and requires a Logs Store to be configured.
How It Works
Delivery is at-least-once: a failed attempt is retried with exponential backoff, and every attempt for the same event reuses the samewebhook-id. Your receiver must be idempotent — dedupe on webhook-id.
Triggering a Delivery
Registering an endpoint does not, by itself, cause any deliveries. Delivery is opt-in per async job: the submit request must carry anx-bf-async-webhook header naming the endpoint to notify.
- The name must resolve to an existing, enabled endpoint. If it doesn’t, the submit request itself fails, rather than accepting the job and silently dropping the notification.
- The endpoint must still be enabled and subscribed to the resulting event (
async_job.completedorasync_job.failed) when the job finishes. If it isn’t, the job completes normally but no delivery is enqueued. - Jobs submitted without the header never trigger a webhook, regardless of how many endpoints are registered.
The Delivery Payload
Each delivery is aPOST with a JSON body and three signing headers:
The body:
Verifying Deliveries
Always verify the signature before trusting a delivery. The signature isHMAC-SHA256 over the exact bytes {webhook-id}.{webhook-timestamp}.{body}, keyed with your endpoint’s signing secret, encoded as v1,<base64>.
To verify a delivery:
- Recompute and compare. Recompute the HMAC from the secret and the received
webhook-id,webhook-timestamp, and raw body, then compare it (in constant time) against every candidate in thewebhook-signatureheader. Accept if any matches — the header can carry more than one signature during secret rotation. - Check the timestamp. Reject deliveries whose
webhook-timestampis outside a tolerance window (5 minutes is a good default) to blunt replay attacks. - Dedupe on
webhook-id. Retries reuse the id, so process each id at most once.
whsec_...) is shown once when you create the endpoint. Store it where your receiver can read it, and never hard-code it.
Managing Endpoints
- Web UI
- API
- config.json
Open Webhooks in the sidebar to see your endpoints and their status.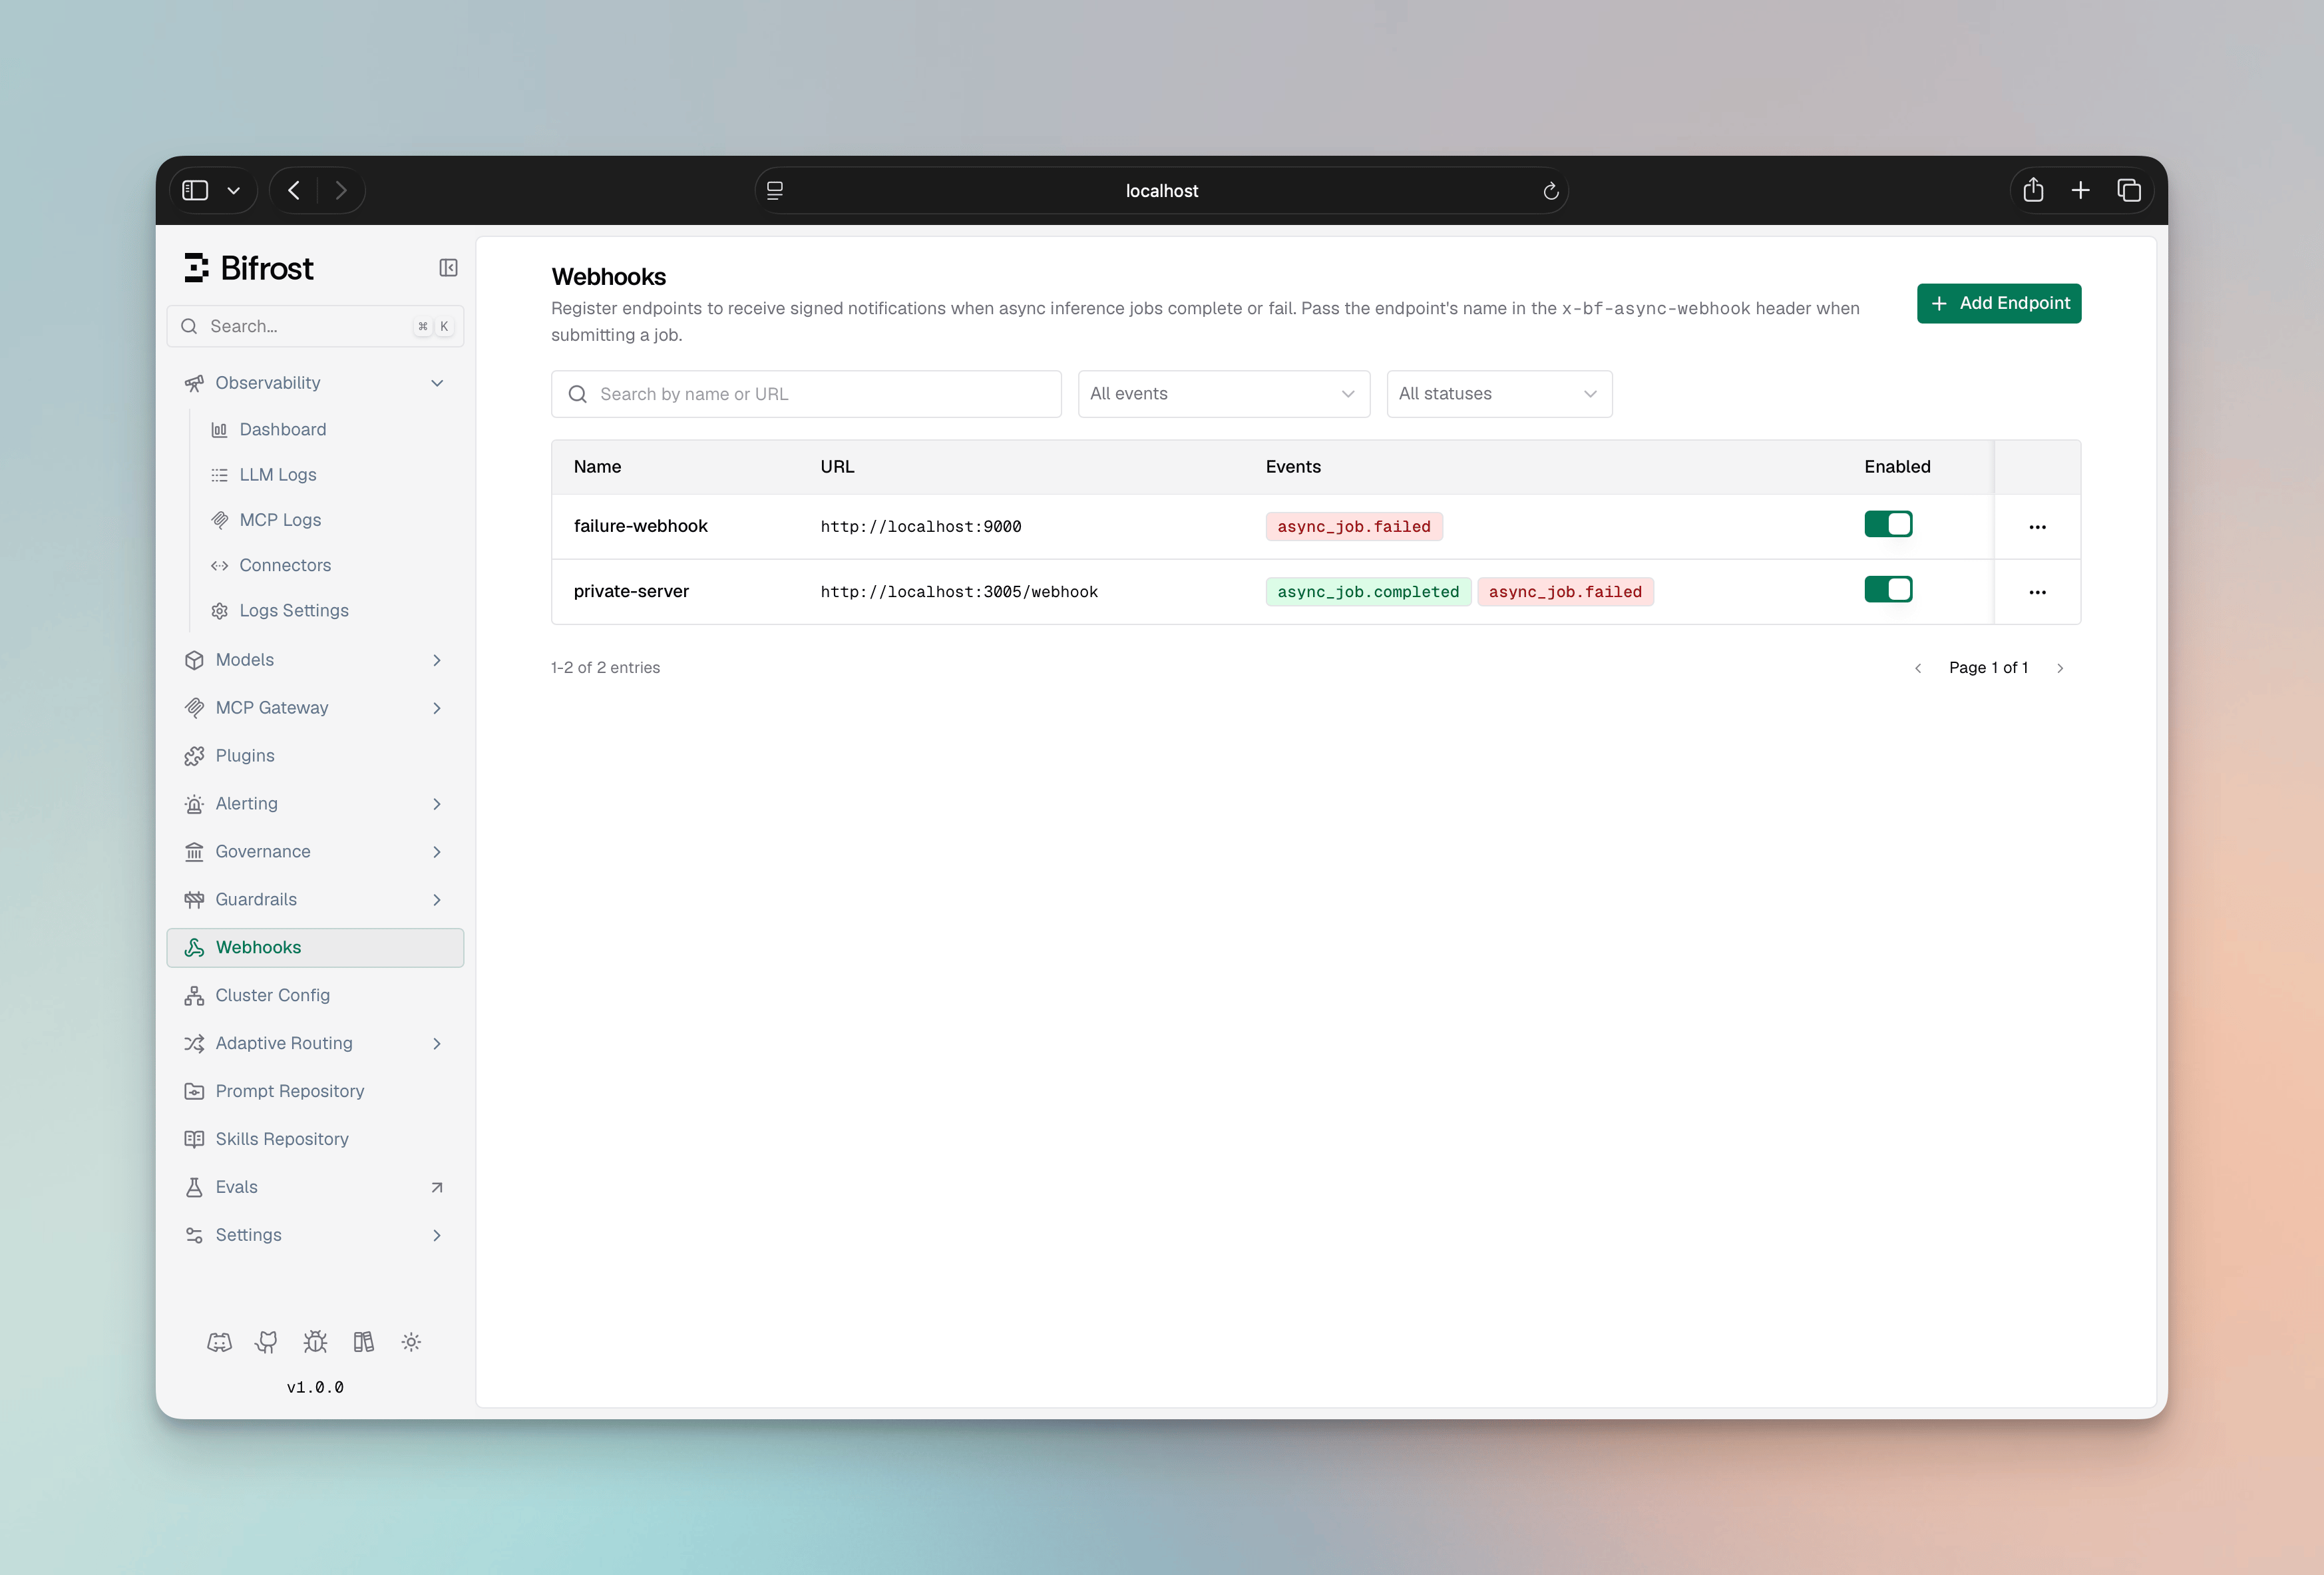
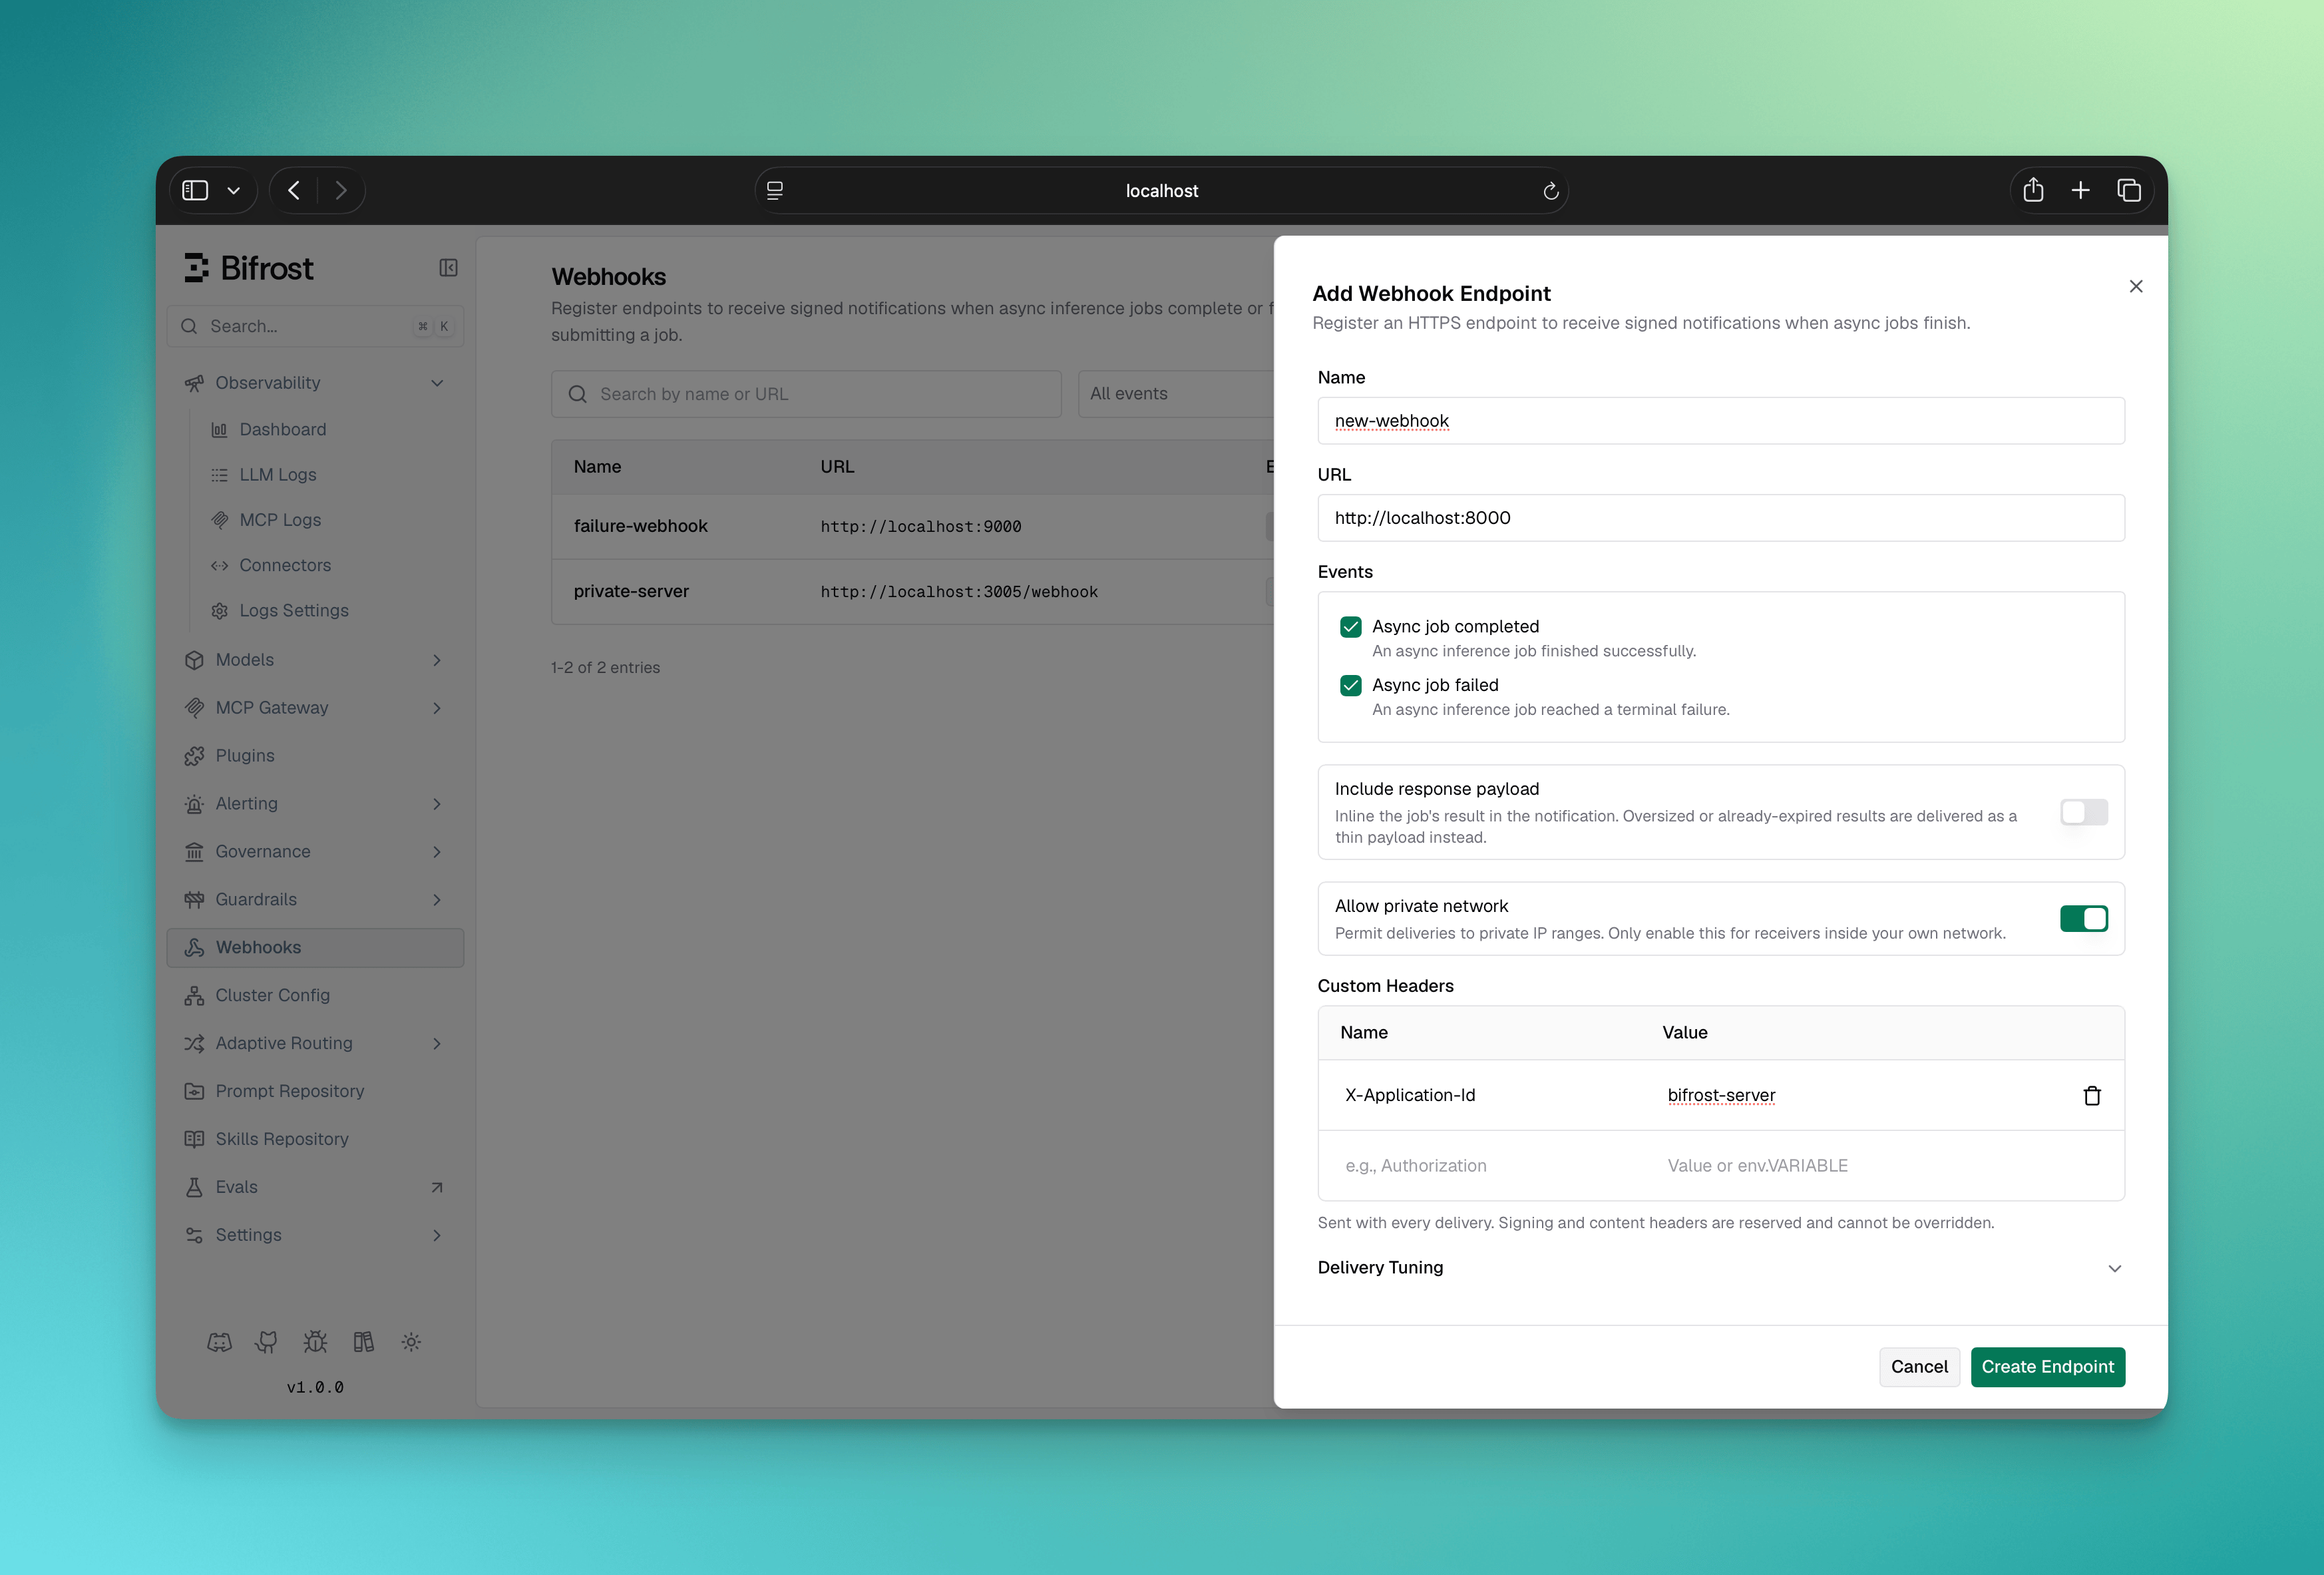
- Select Add Endpoint.
- Enter a unique Name and the delivery URL (HTTPS unless the endpoint allows private networks).
- Choose the events to subscribe to (
async_job.completed,async_job.failed). - Optionally add custom headers (for example an
Authorizationvalue your receiver requires) and toggle Include response to inline job responses.
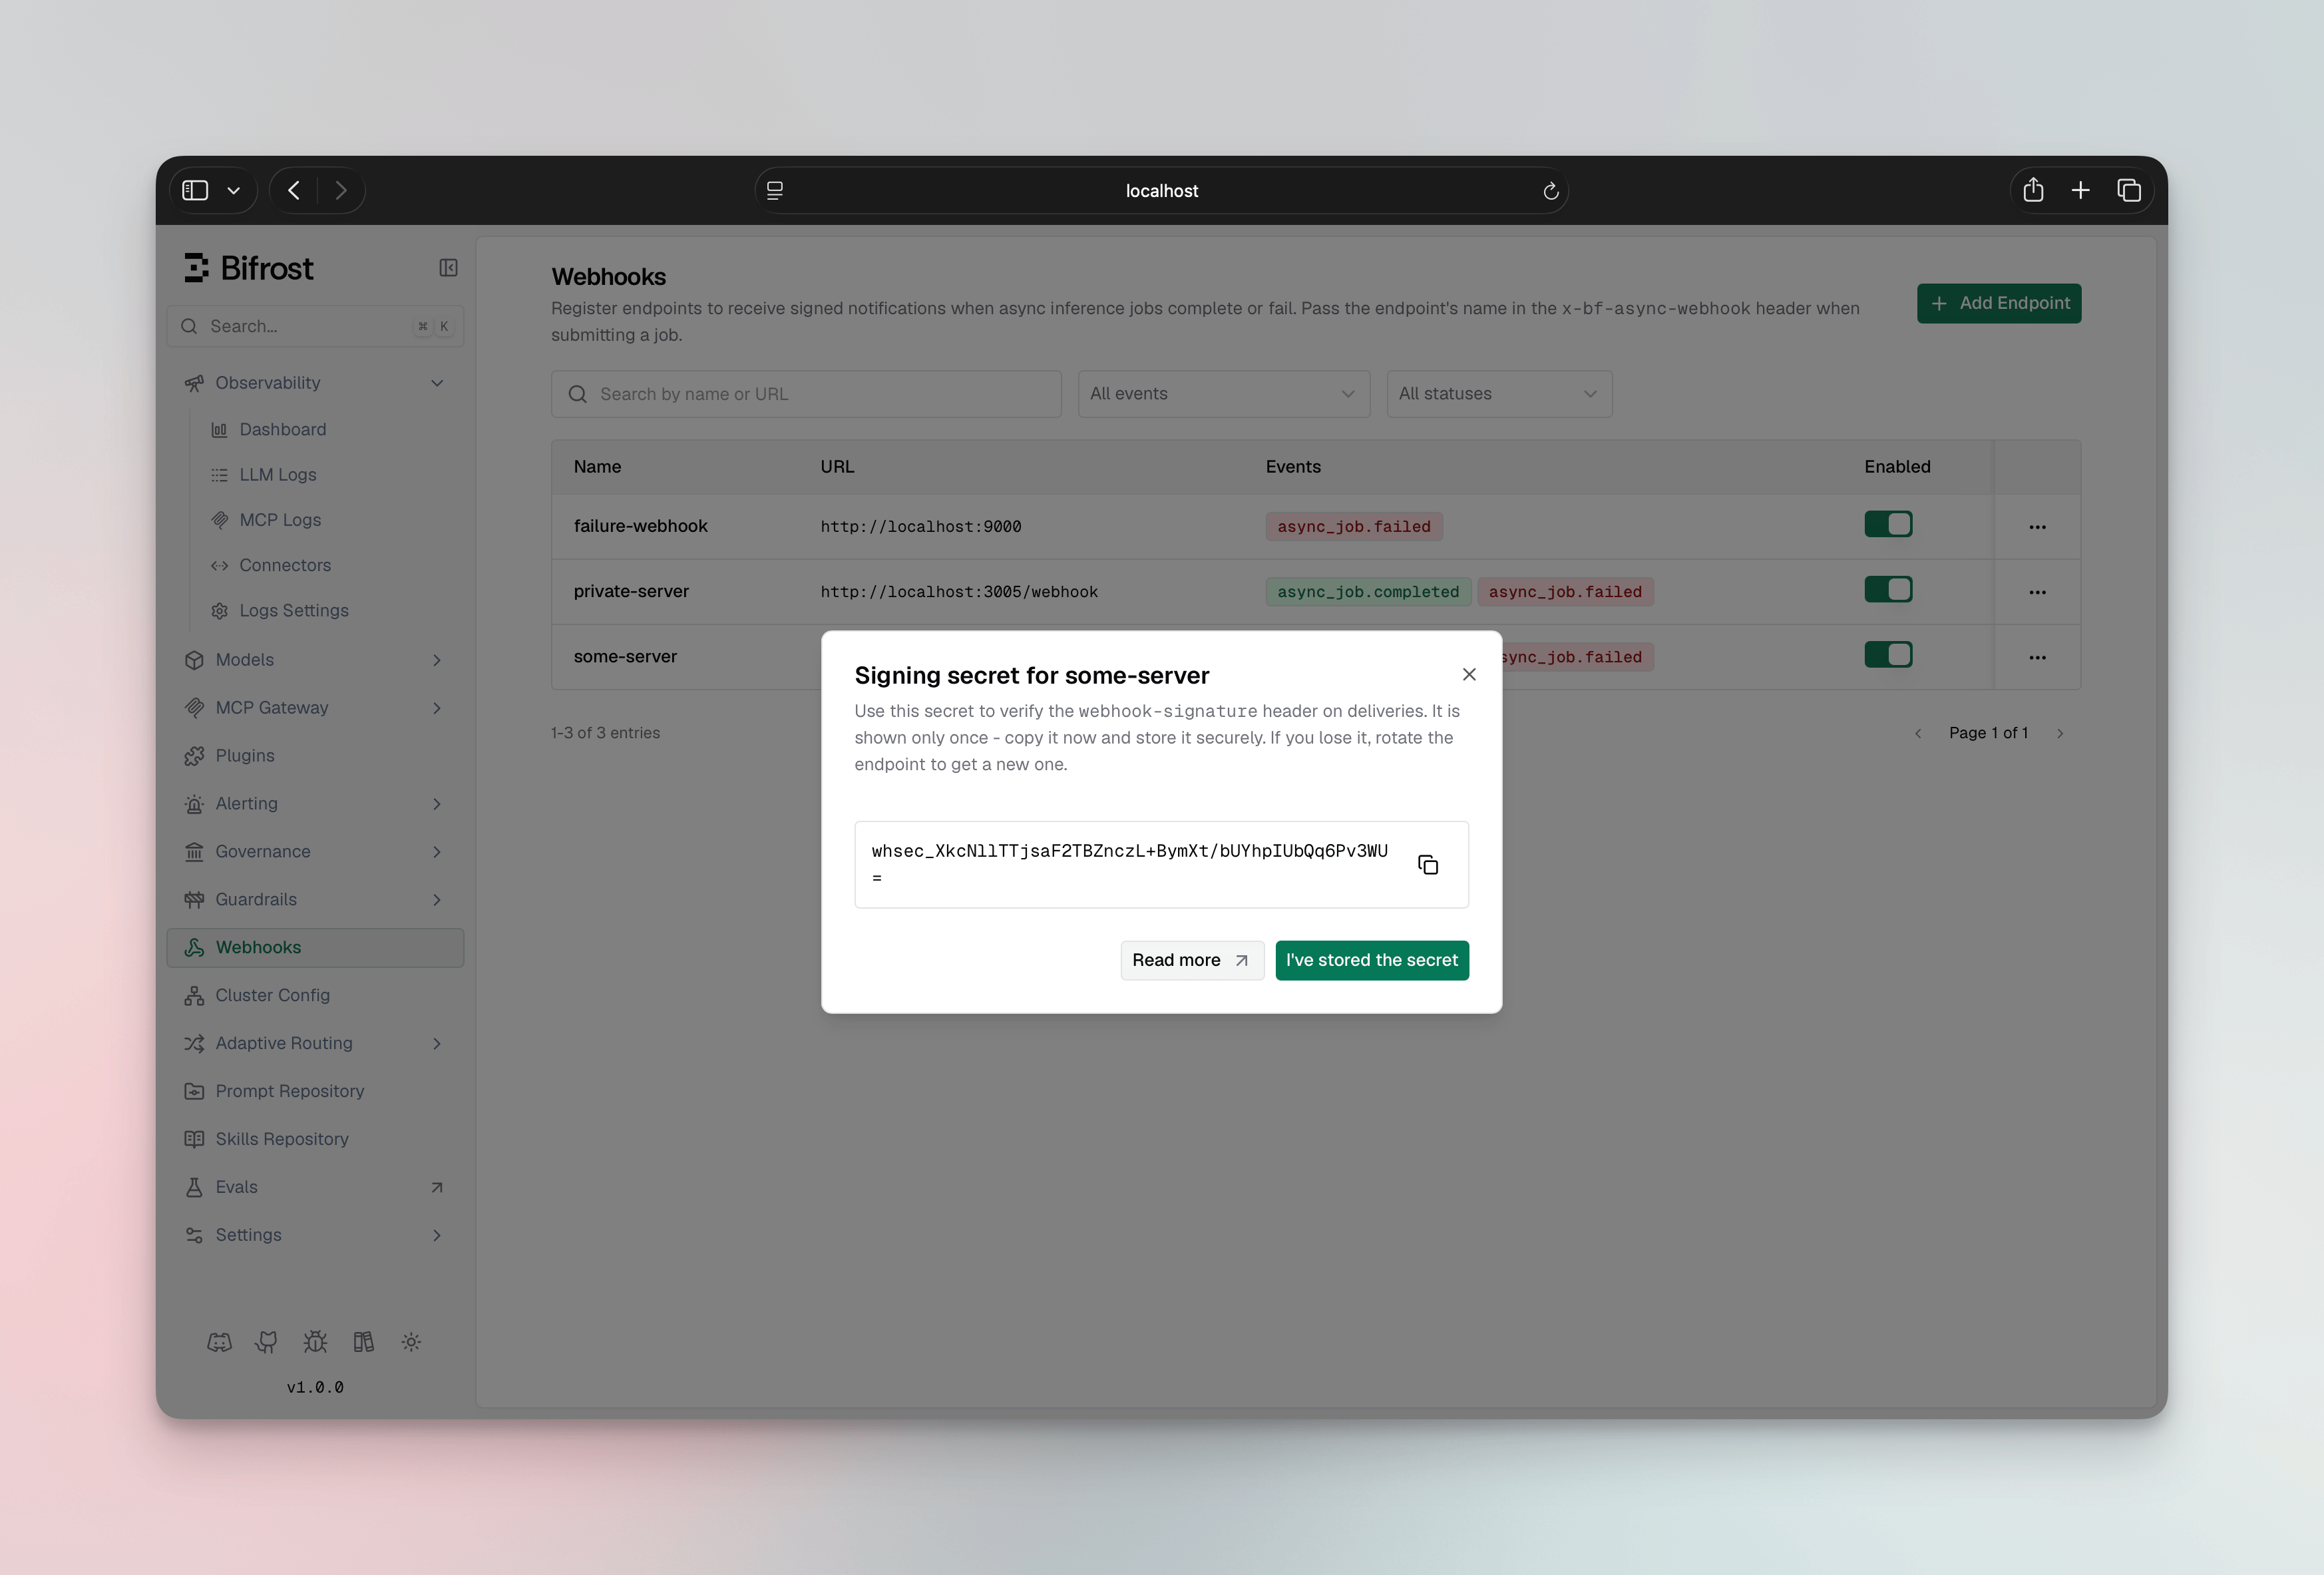
- Save. The signing secret is shown once in a dialog — copy it now; you cannot retrieve it again.
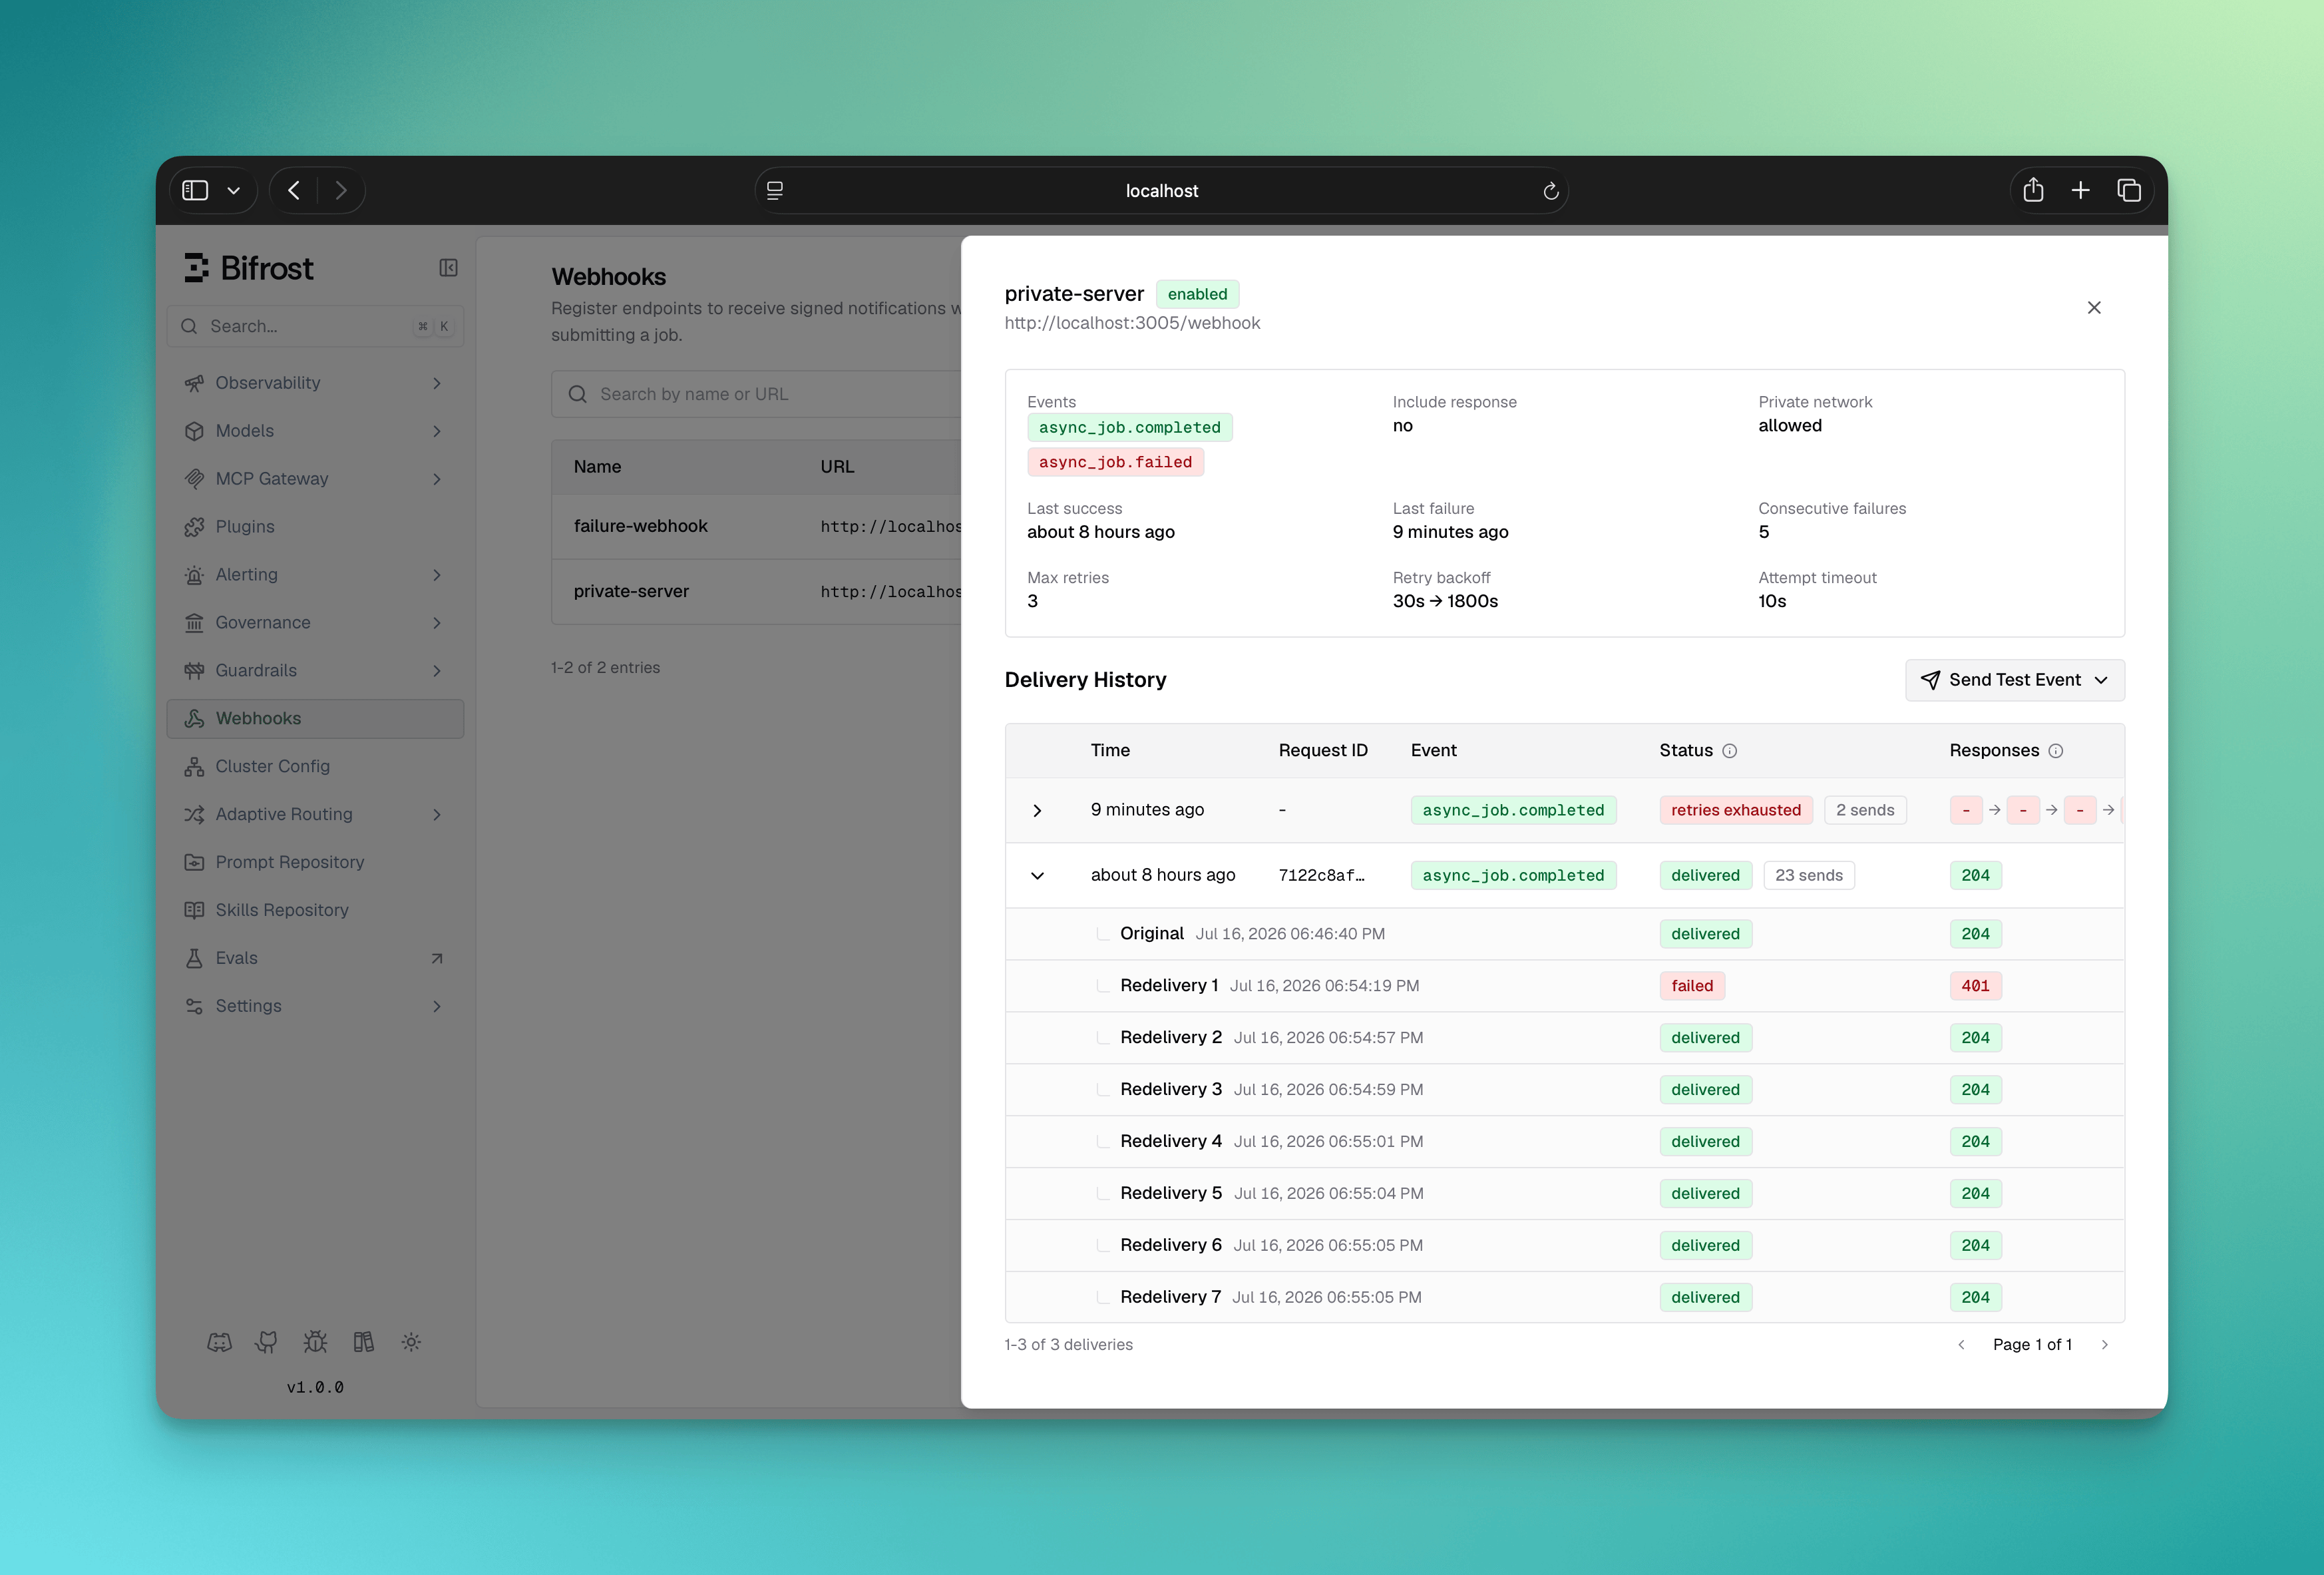
- Open an endpoint to see its recent deliveries, send a Test delivery, or Rotate secret if a secret is ever exposed. Rotation takes effect immediately with no grace window, so update your receiver in the same change.
- For anything beyond the last few deliveries, use View delivery history to open the dedicated deliveries page at
/workspace/webhooks/deliveries. It lists deliveries across every endpoint and filters by outcome, event, response status class (2xx/4xx/5xx/no response), webhook, and time range, with lookup by request ID or delivery ID. Arriving from an endpoint pre-selects that webhook; clear the filter to see deliveries fleet-wide.
Rows are grouped by delivery, not by attempt: one row is one notification owed to the endpoint, and its
503 → 503 → 200 chips are that delivery’s attempts. A delivery that was manually redelivered expands to show each send separately.Tuning Deliveries
Each endpoint exposes per-endpoint controls. All are optional and fall back to the defaults below.Next Steps
- Async Inference — submit jobs and poll for results; webhooks notify you when those jobs finish.
- Virtual Keys — the
x-bf-vkkeys used to submit async jobs and fetch results. - Storage: Logs Store — configure the Logs Store that both Async Inference and Webhooks require.