Prerequisites
- An OIDC-capable identity provider with admin access
- Bifrost Enterprise deployed and accessible
- Your Bifrost callback URL:
https://<your-bifrost-domain>/login - The ability to create a confidential (client secret) OAuth 2.0 application in your IdP
- Bifrost roles created for the roles you plan to map
Step 1: Create an OIDC application in your IdP
Register a new application
In your identity provider’s admin console, create a new application. Look for options like Create App Integration, Add Application, New Application, or Register Client.Choose a type that matches the Authorization Code flow with a server-side callback — typically Web Application or Regular Web Application with a Confidential client. Avoid SPA or Native types.
Step 2: Configure token claims
Ensure the required scopes are requested
Your application must request the following OAuth scopes:
openid— required for OIDCprofile— providesname,given_name,family_nameemail— provides the user’s email addressoffline_access— provides a refresh token for session maintenance (if supported)
Include group or role claims
For role and team mapping to work, your IdP must include group memberships or role values in the ID token.
Any claim present in the ID token is available for mapping in Bifrost.
| Provider type | How to add group/role claims |
|---|---|
| Okta / Auth0 | Add a groups claim in the app settings or via an Action |
| Keycloak / Zitadel | Enable project/realm role claims in token settings |
| LDAP-backed IdPs | Map LDAP group attributes to OIDC claims |
| Generic OIDC | Use your provider’s claim mapping or transformation rules |
Step 3: Copy your credentials
Note the Issuer URL, Client ID, and Client Secret
From your application settings, copy:
The issuer URL typically looks like
| Value | Where to find |
|---|---|
| Issuer URL | Also called OIDC Issuer or Authorization Server URL. Must match the iss claim in the JWT. |
| Client ID | Application ID or Client ID |
| Client Secret | Application secret (confidential clients only) |
https://auth.company.com or https://auth.company.com/realms/my-realm. Bifrost uses it to discover endpoints via <issuer>/.well-known/openid-configuration.Step 4: Assign users
Grant users access to the application
In your IdP, assign the users or groups that should be able to log in to Bifrost:
- Explicit assignment — add users directly to the application
- Group-based access — assign a group; all members get access
- Policy-based — configure an access policy
Step 5: Configure Bifrost
Open User Provisioning and choose Generic OIDC
In your Bifrost dashboard, go to Governance → User Provisioning.Select Generic OIDC Provider and click Next.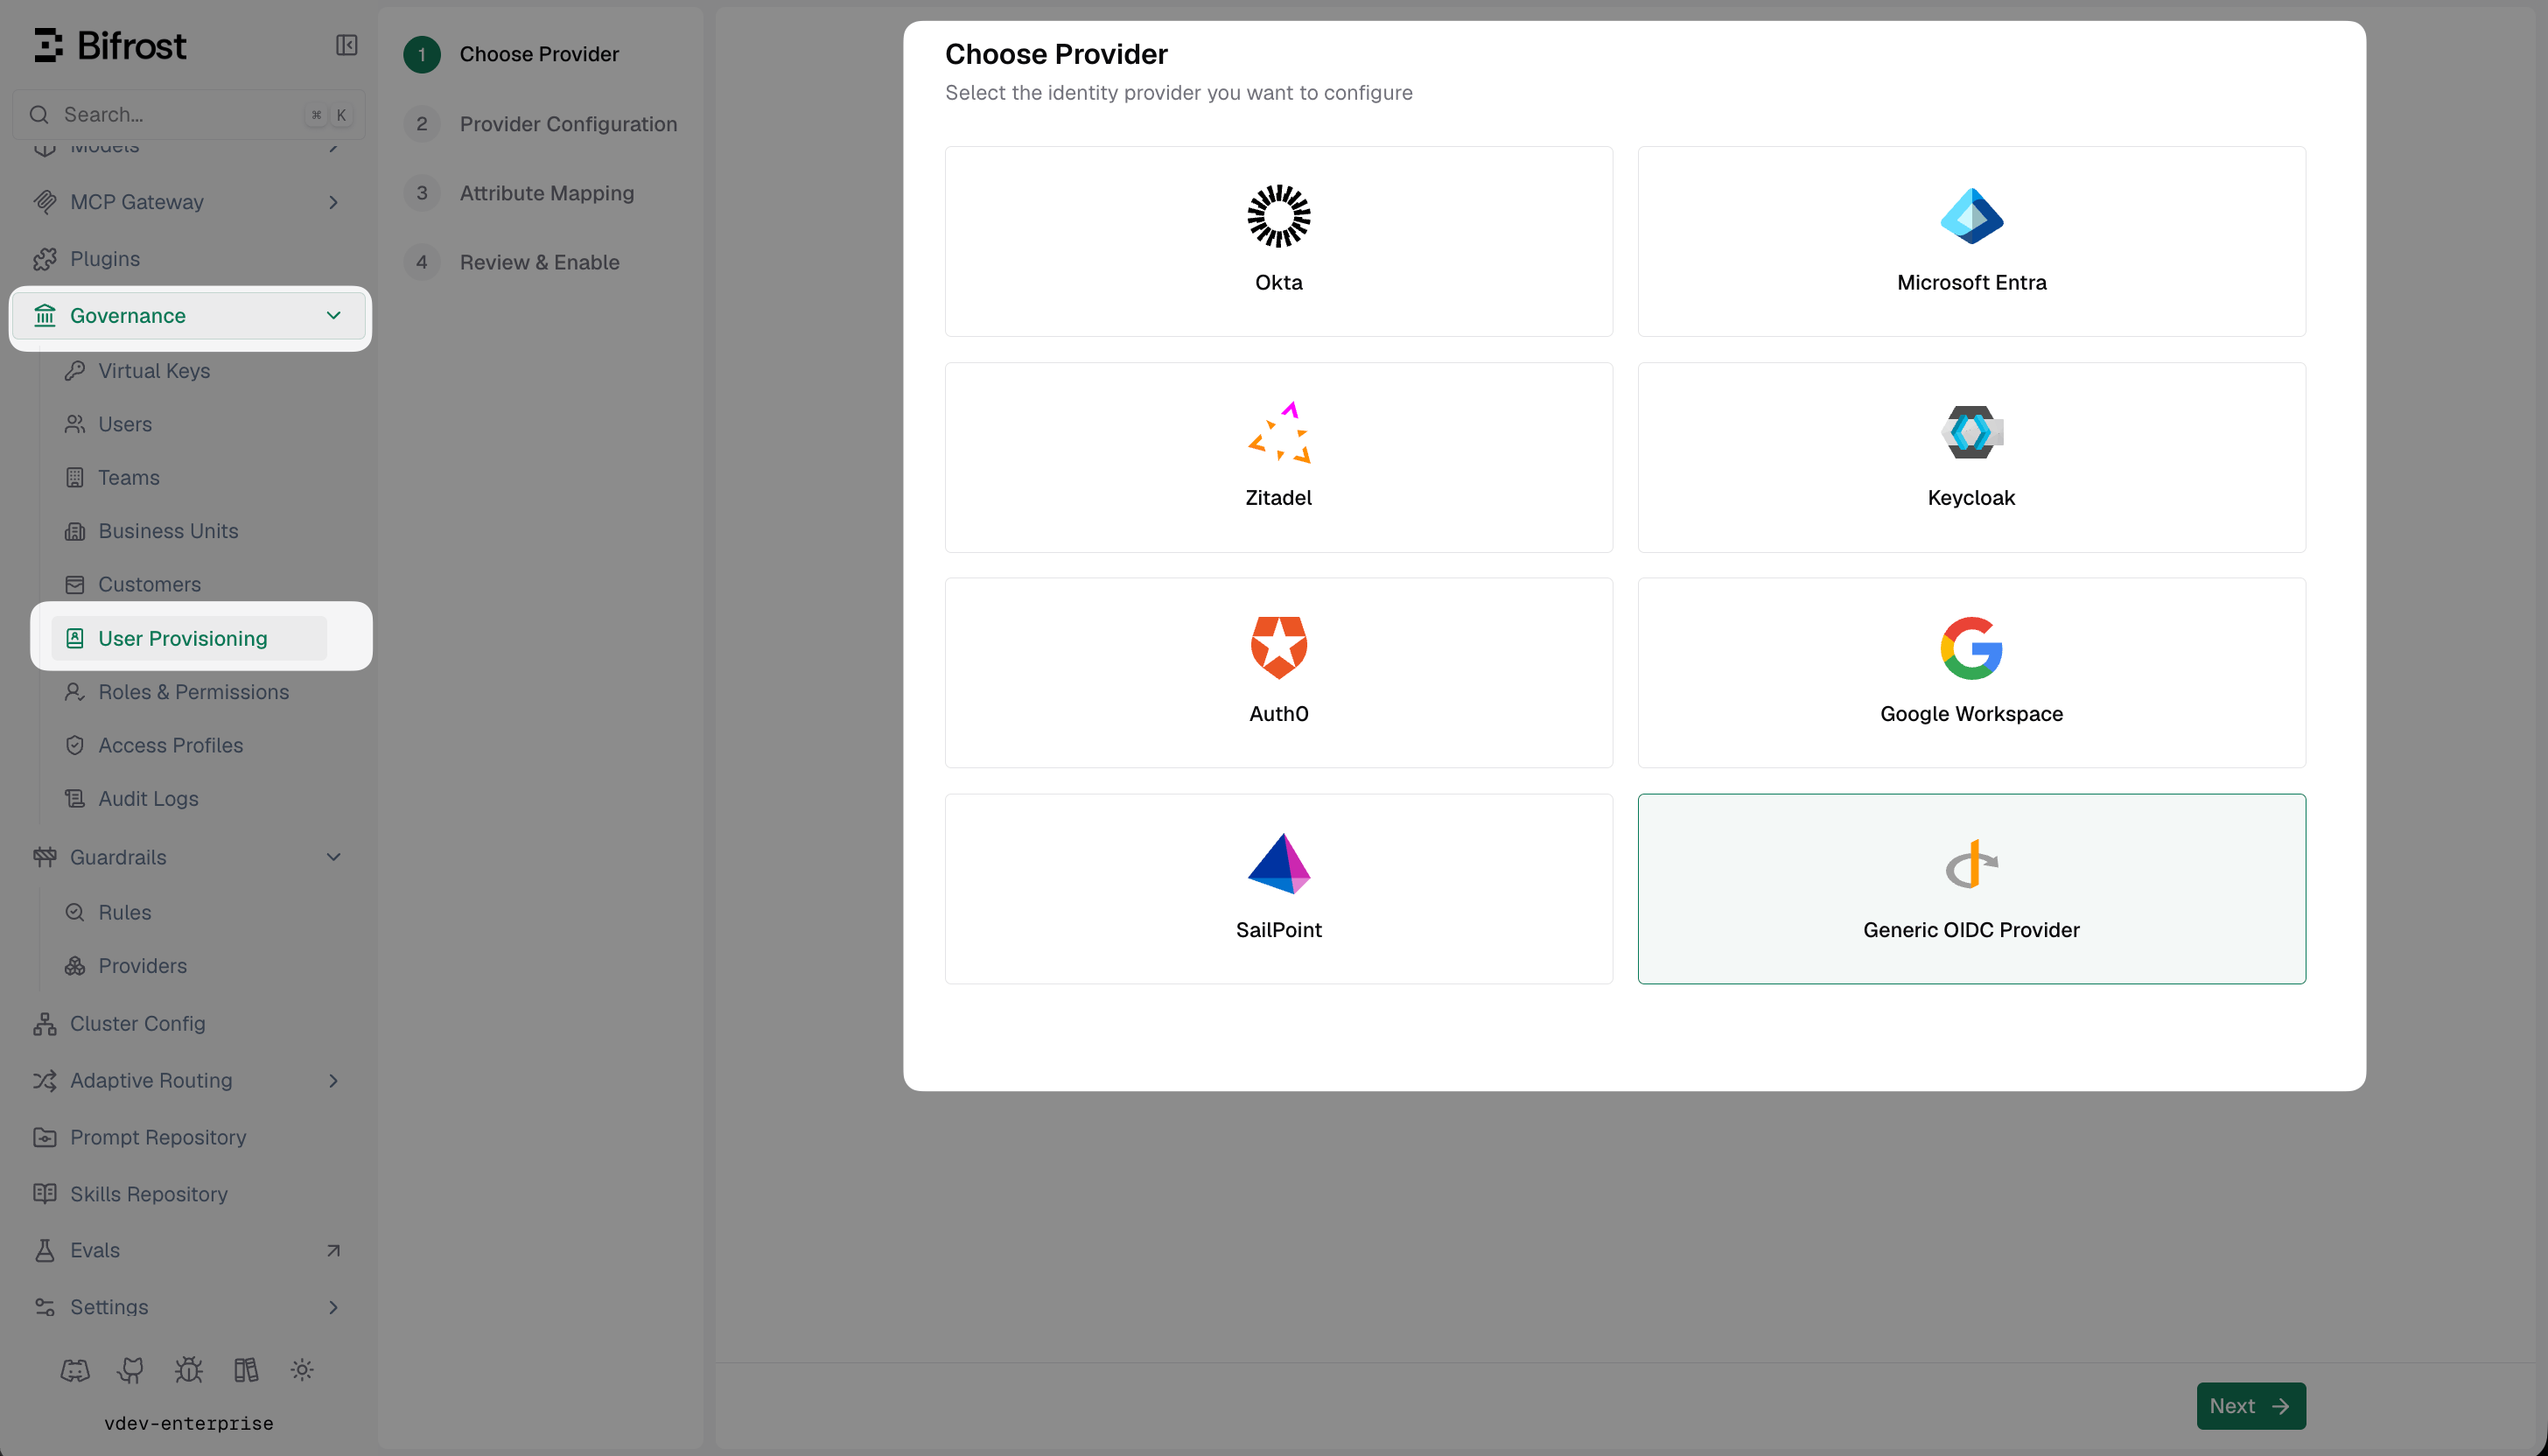
Fill in the provider configuration
Enter the credentials you copied in Step 3:
Click Discover endpoints to auto-fill the authorize, token, and userinfo endpoints from your issuer’s discovery document. Then click Verify & Next.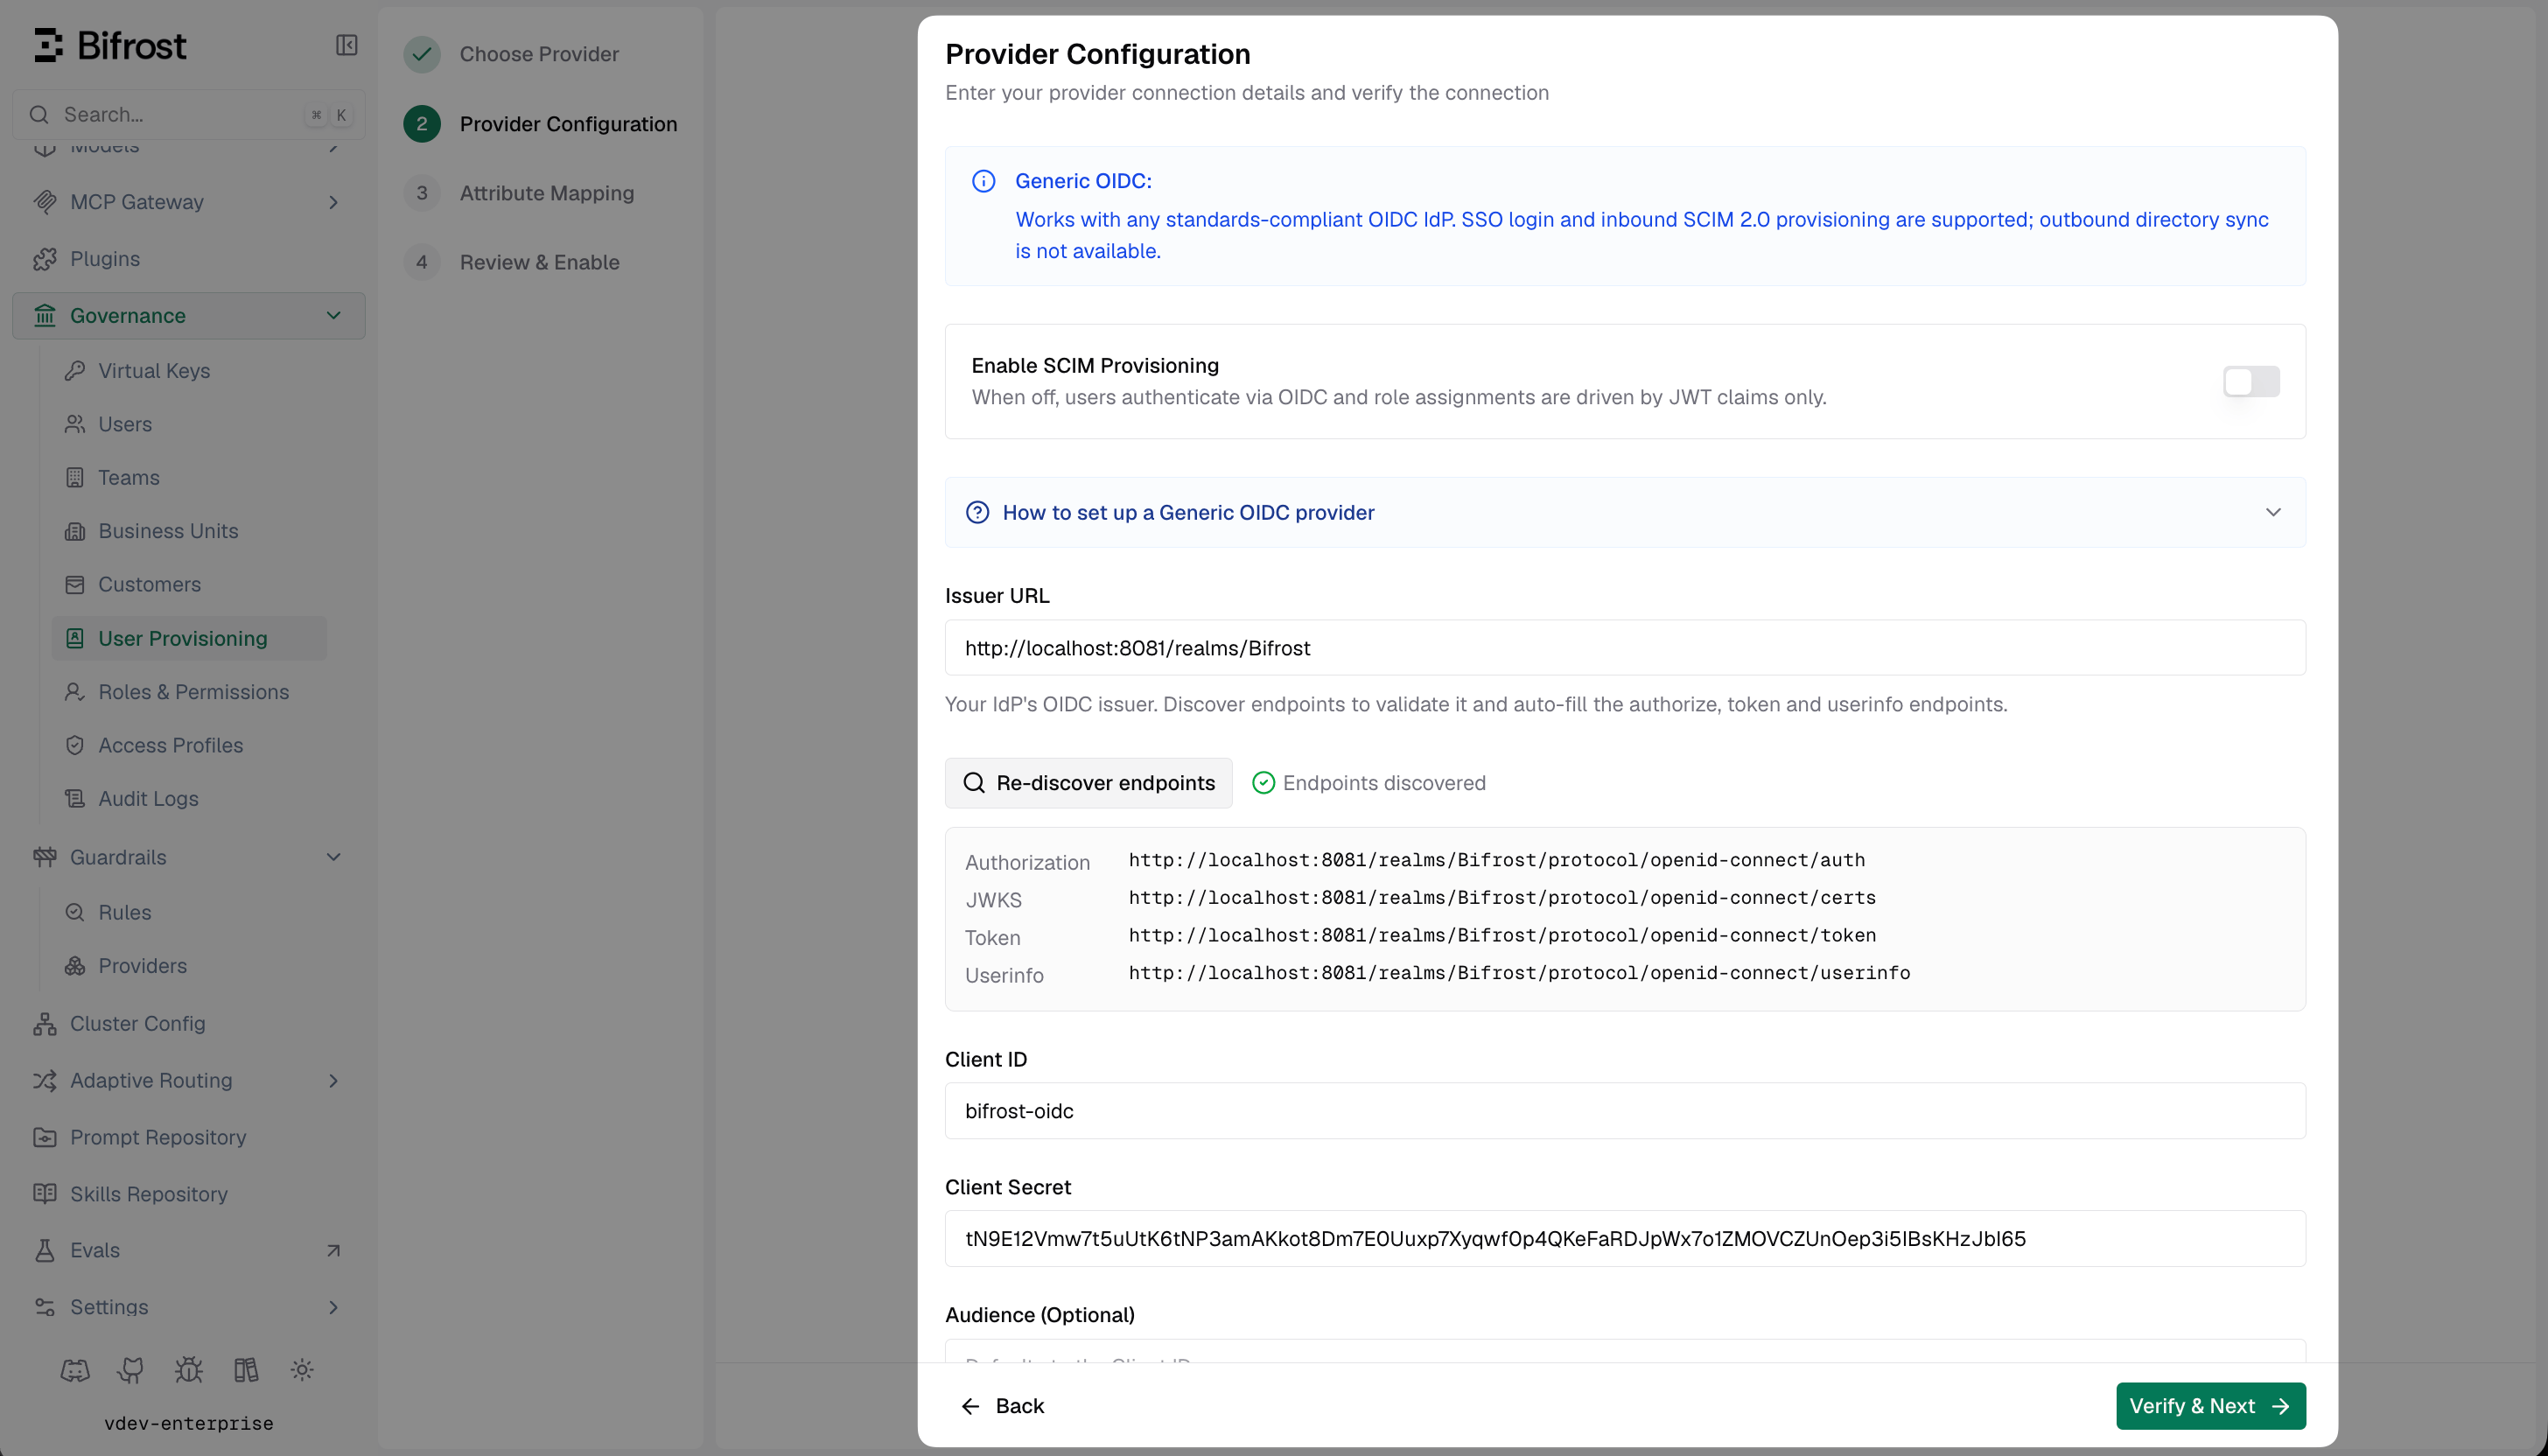
| Field | Value |
|---|---|
| Issuer URL | Your IdP’s OIDC issuer URL (no trailing slash) |
| Client ID | Application Client ID |
| Client Secret | Application Client Secret |
| Audience | Optional — the expected aud claim. Defaults to Client ID. |
Discover claims
On the Attribute Mapping screen, click Discover Claims to fetch live claims from your IdP.Bifrost opens a sign-in popup — no session is created. Once you authenticate, it returns the exact claims your IdP is sending in the JWT. Use this to confirm which attributes — groups, roles, department, or custom claims — are present before building your mappings.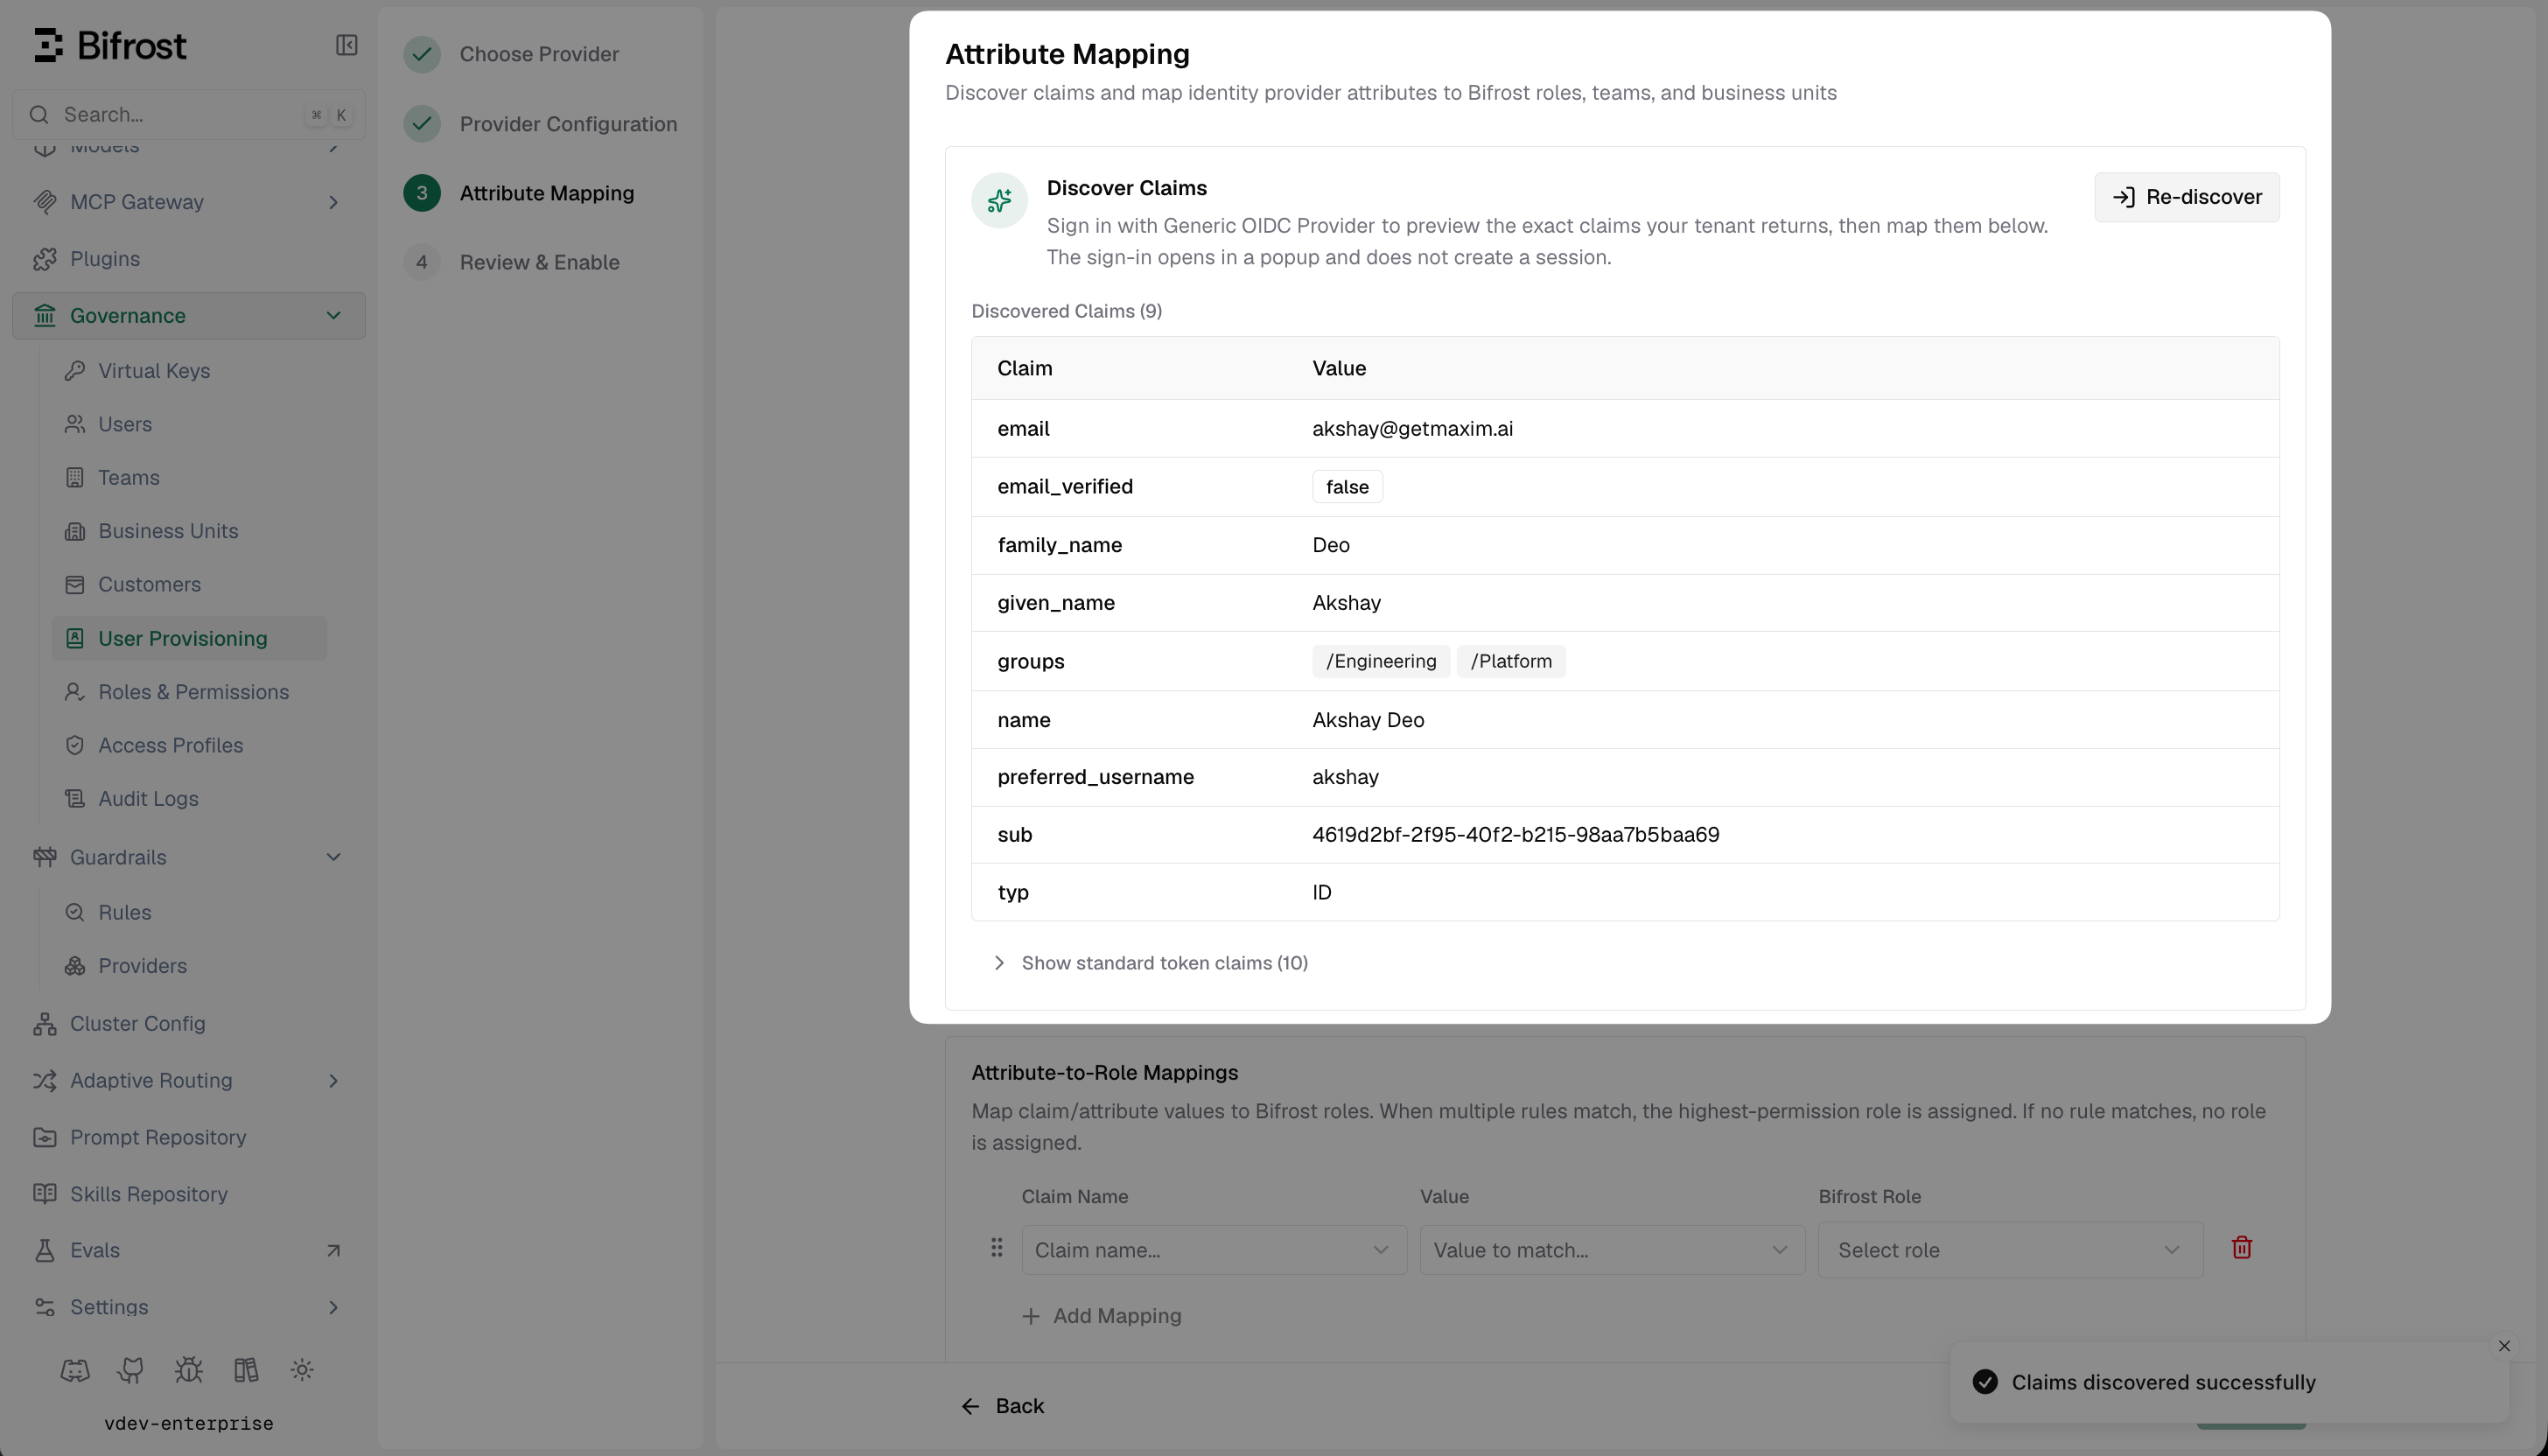
If Discover Claims fails, confirm your IdP is configured to allow the
openid, profile, and email scopes and that the discovery callback URI is registered.Set up attribute mappings
Use the sections below the claim list to map IdP claim values to Bifrost roles, teams, and business units.Attribute-to-Role MappingsMap a claim value to a Bifrost role. All matching rules are evaluated — if multiple rules match, the role with the highest permissions is assigned. If no rule matches, login is denied.Attribute-to-Team MappingsMap a claim value to a Bifrost team. All matching rules apply.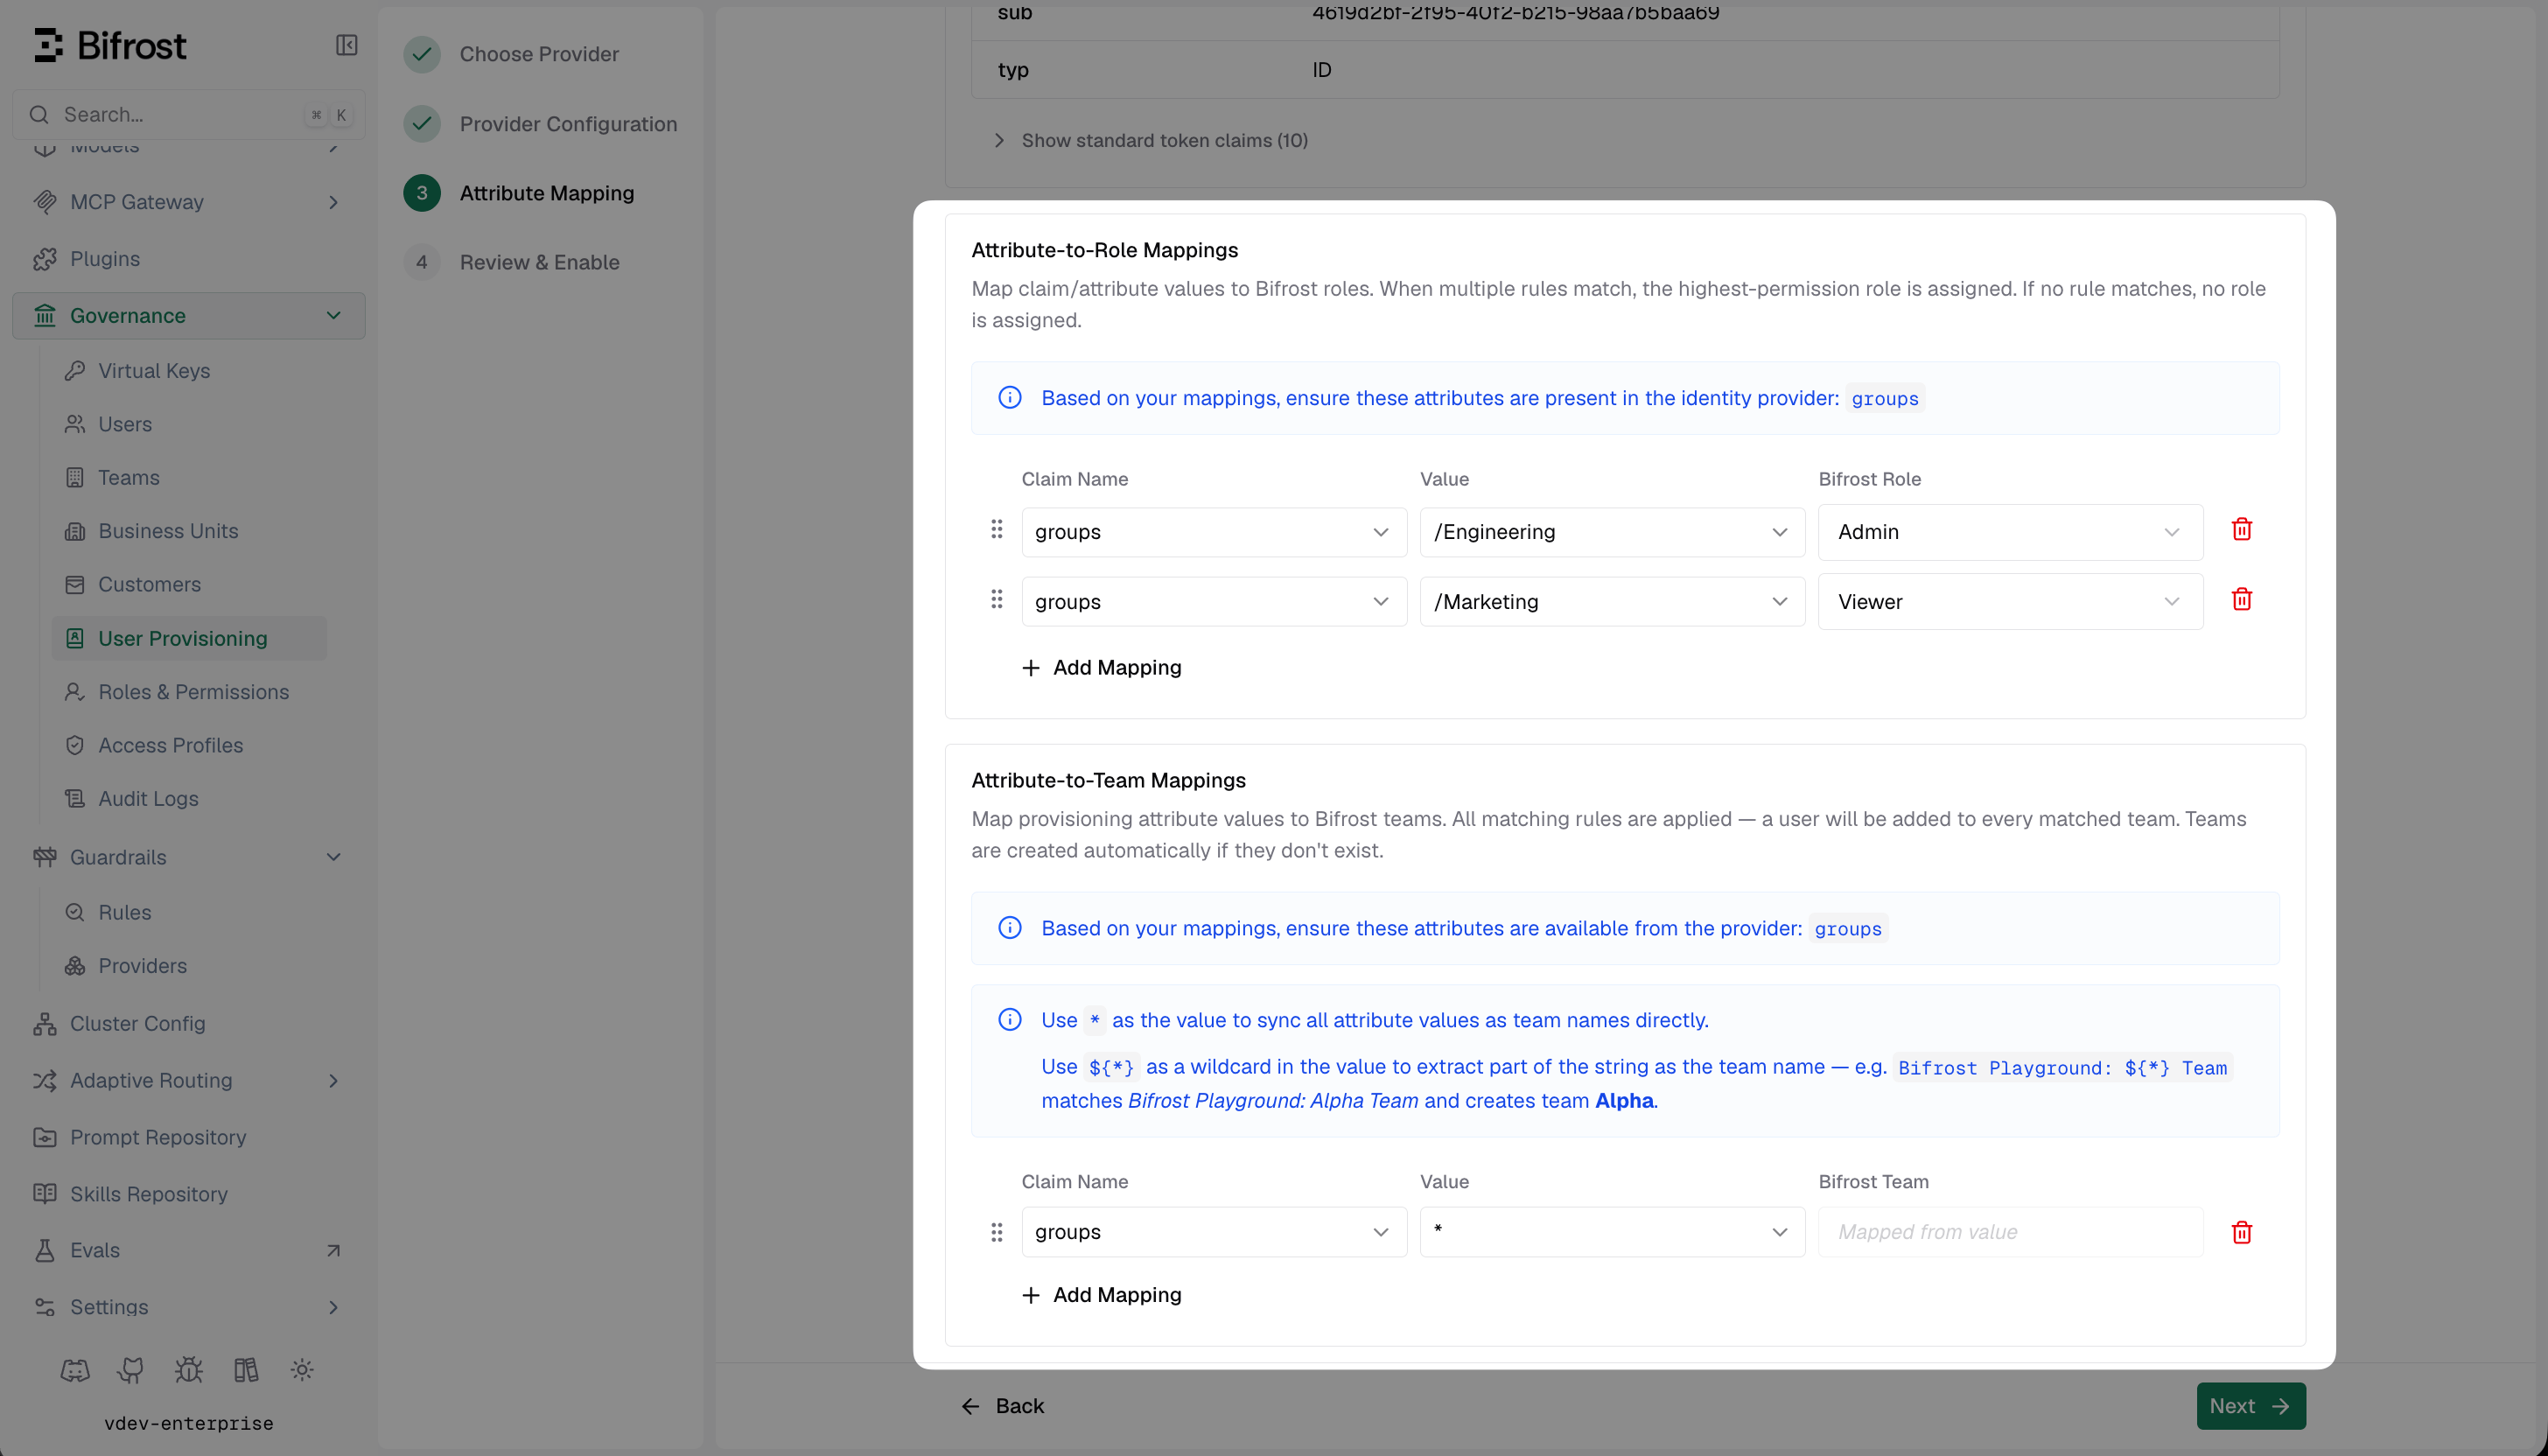
- Use a specific value (e.g.
engineering) to map that exact claim value to a named team - Use
*to sync the claim value directly as the team name - Use
${*}to extract part of the string — e.g./${*}matches/Engineeringand creates team Engineering
Setting a value to
* maps the claim value directly as the entity name. Value comparisons are case-insensitive.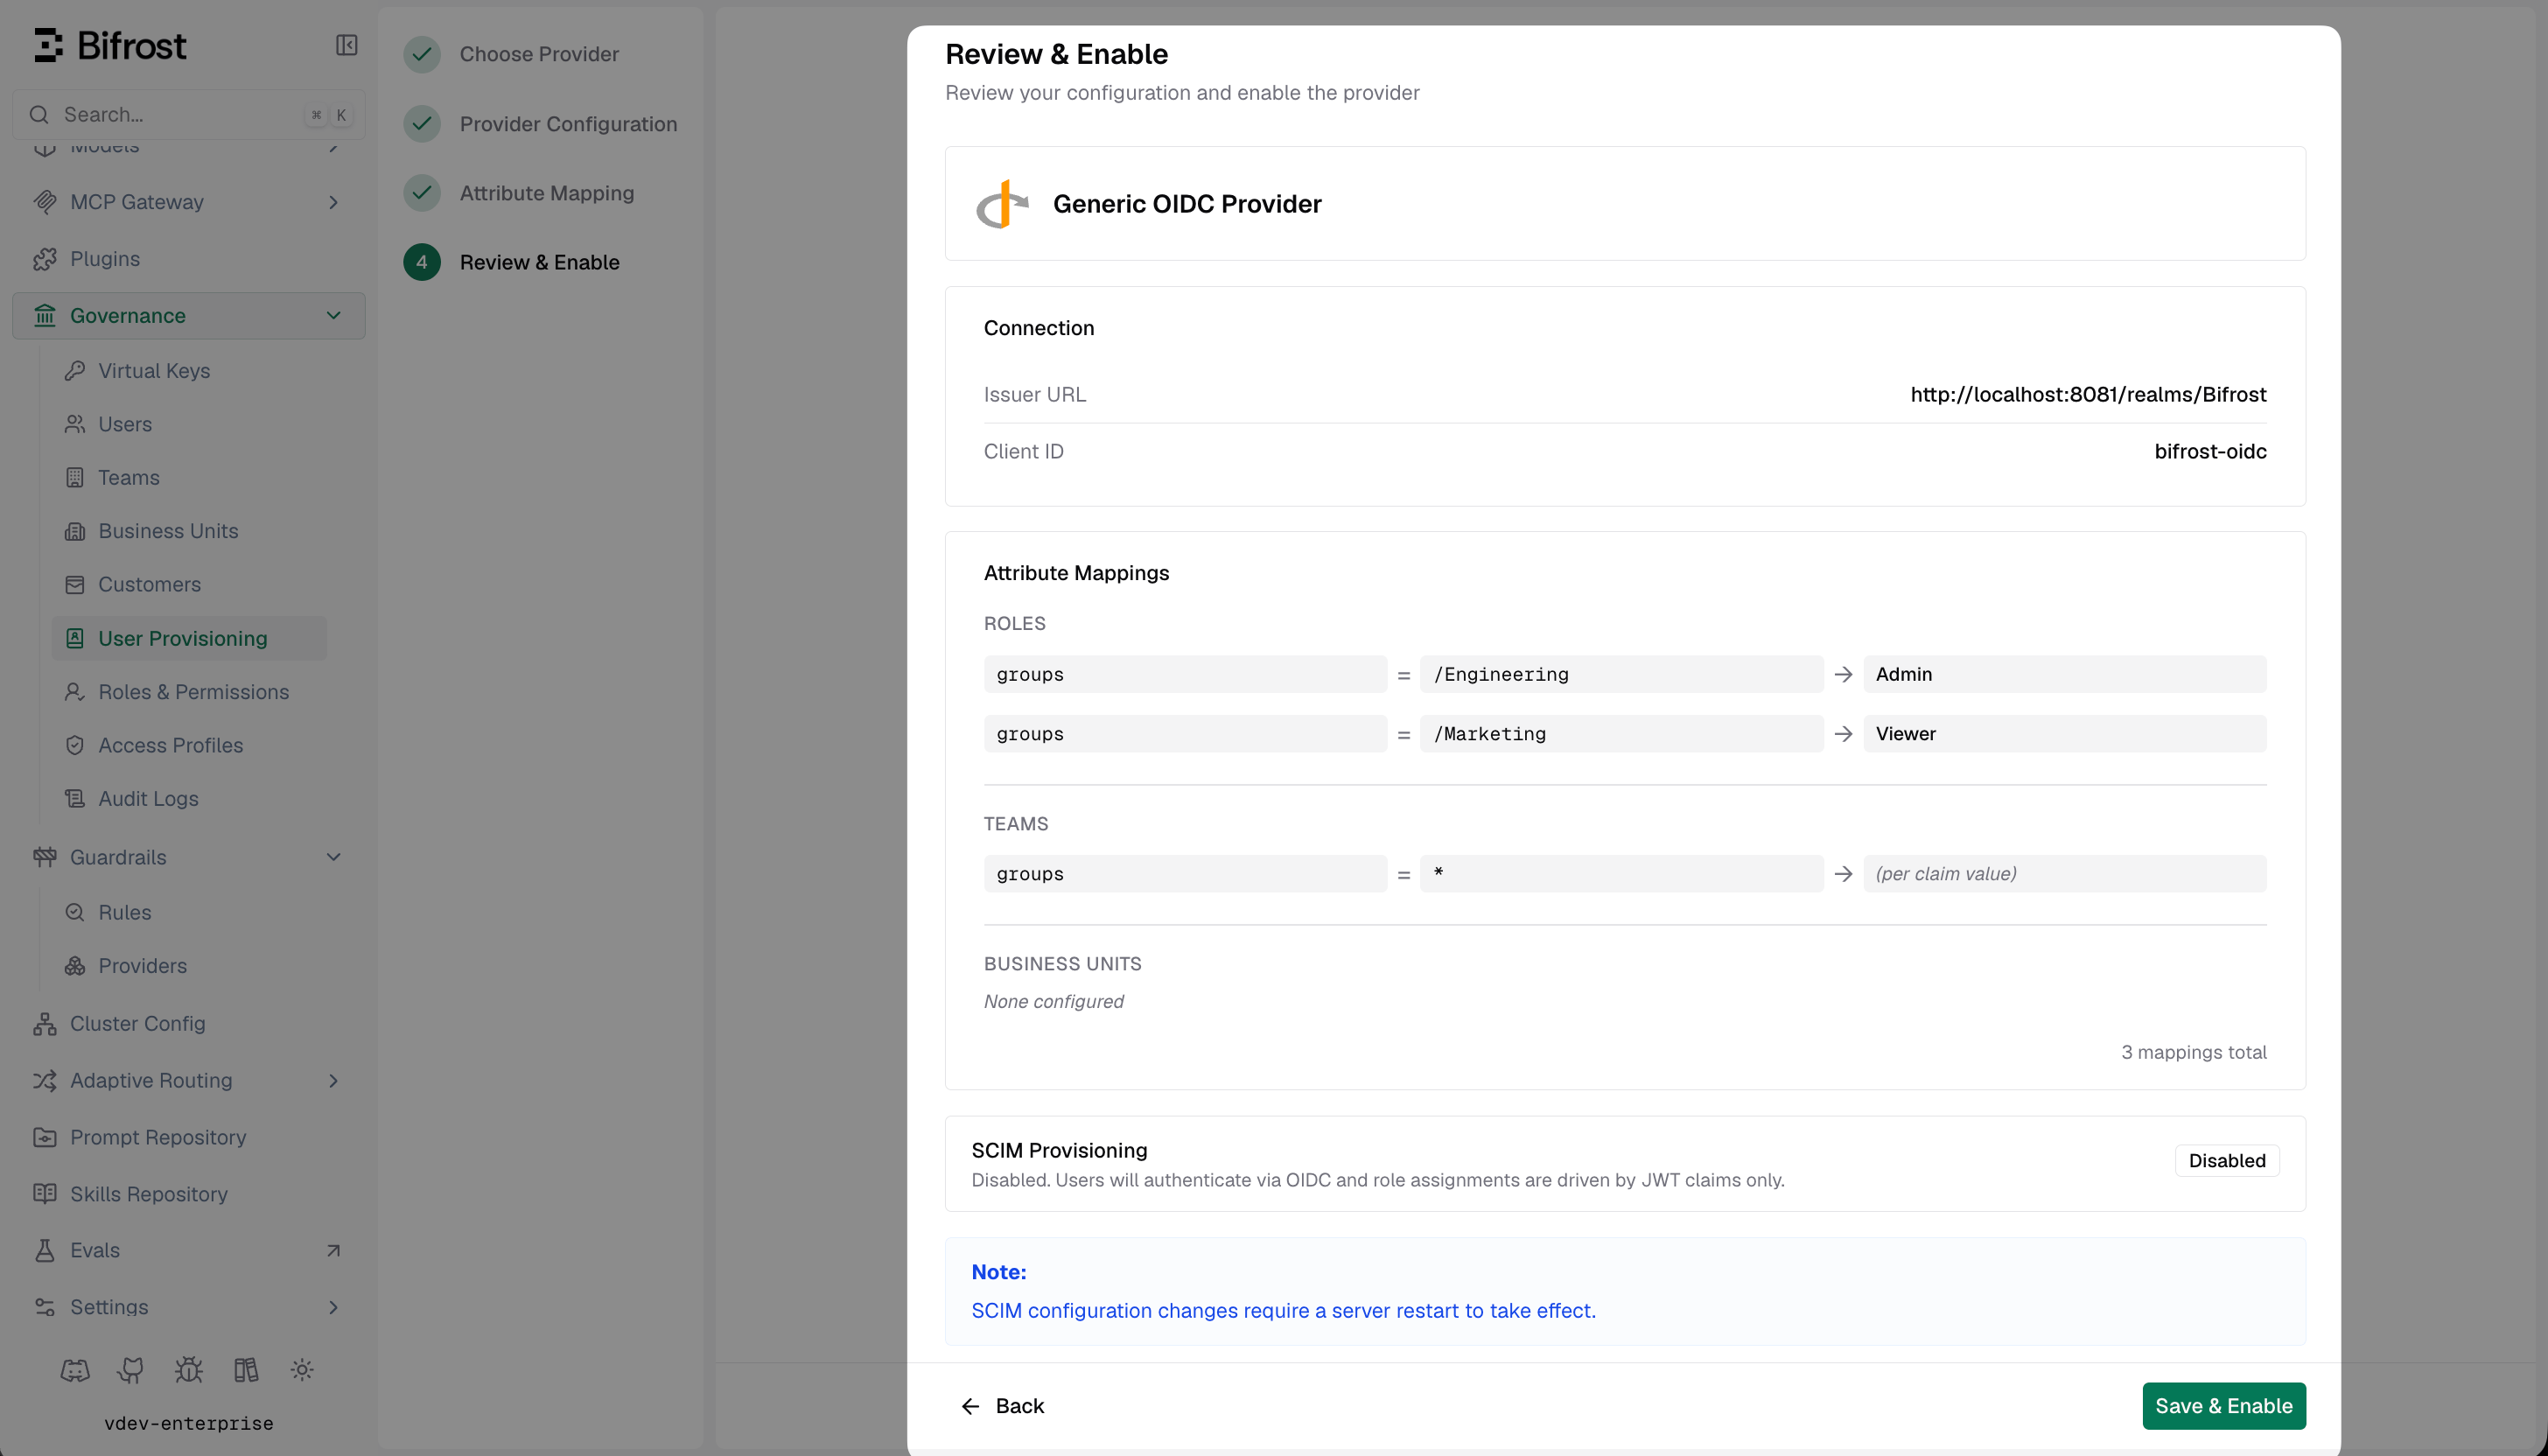
How background sync works
Bifrost refreshes active OIDC sessions every 15 minutes. If a session cannot be refreshed, Bifrost checks with your IdP whether the user is still active; if the IdP reports the user as inactive, Bifrost decommissions that user locally. For providers that support it, see SCIM with Generic OIDC to enable real-time user and group provisioning.Troubleshooting
User is not redirected to the IdP — verify the provider is enabled in Bifrost and the server was restarted after saving. Confirm the Issuer URL has no trailing slash and is reachable from your Bifrost server. JWKS validation fails — Bifrost fetches<issuer>/.well-known/openid-configuration to discover the JWKS endpoint. Ensure this URL is reachable from your Bifrost host.
Audience mismatch — set the Audience field in Bifrost to match the aud claim in the JWT. Leave blank to default to the Client ID.
Claims are present in Discover Claims but role mapping is not working — confirm the claim name matches exactly what the IdP sends (case-sensitive, including namespacing). Dotted paths (e.g. realm_access.roles) are supported.
Login fails after successful IdP authentication — check that the redirect URI in your IdP exactly matches https://<your-bifrost-domain>/login. Trailing slashes and path differences are not allowed.